

Product Schedules Quick Start Guide
The GSP Product Schedules app enables users to create schedules against Opportunity Products directly in Salesforce. These schedules allow you to track projected Revenue or Quantity over time, depending on the type of product you’re working with.
Each Opportunity Product can have its own scheduling method, meaning you can schedule Revenue for one product and Quantity for another. Both scheduling methods can be used within the same Salesforce environment.
A brief setup is needed to ensure the appropriate fields and components are visible on your Opportunity and Opportunity Product records. The following steps will help you get everything configured and ready to use.
Steps to Complete
Install the Product Schedules App:
- Open the GSP Product Schedules listing on the Salesforce AppExchange.

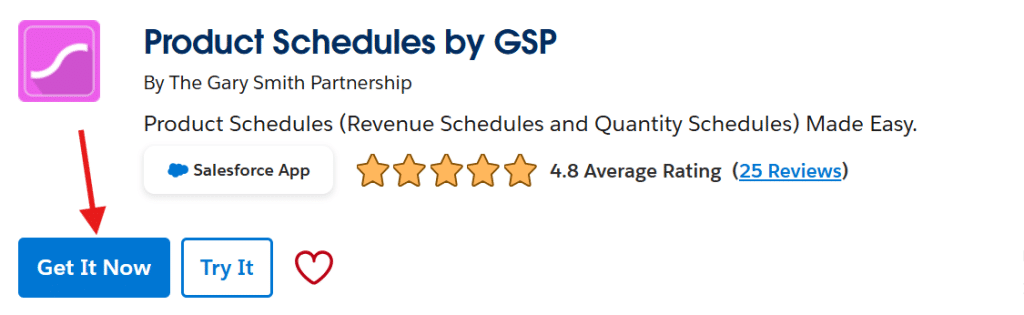
- Click the blue “Get It Now” button and follow the installation instructions.
- Choose whether to install the app in your Production or Sandbox environment.
- We highly recommend selecting “Install for All Users”.
- You will receive a 14-day free trial when installing the app into an environment for the first time. No payment details are required.
- Once installed, confirm that Product Schedules appears in your Installed Packages list.
- Navigate to Salesforce Setup and search for “Installed Packages” in the Quick Find bar.
- If the package doesn’t appear straightaway, allow Salesforce a little more time to complete the installation and refresh the page.
- For more detailed installation instructions, refer to the How to Install the Product Schedules App article.
Apply the Permission Set:
- Assign the “GSP Product Schedules (Full Access)” Permission Set to the appropriate users.
- We highly recommend using our permission set, as it grants the correct permissions required to work with Product Schedules.
- Adjusting permissions manually may lead to unexpected interactions or functionality issues.
- For detailed instructions, refer to the Apply the Product Schedules Permission Set article.
Update the Page Layouts:
The final stage is to make the Product Schedules fields and functionality visible on your Opportunity and Opportunity Product records. You’ll need to update the following four areas:
- Update the Opportunity Page Layout.
- Add the “# Schedules” field.
- Add the “Total Schedule Revenue” and/or “Total Scheduled Quantity” fields, depending on which scheduling methods you intend to use. Both fields can be added if you intend to use both methods.
- Add the “Manage Schedules” Lightning Action.
- Add the Product Schedules Related List.
- For detailed instructions, refer to the Adjust the Opportunity Page Layout article.
- Update the Opportunity Lightning Page Layout.
- Open an existing Opportunity and click the cog in the top-right corner of Salesforce.
- Select “Edit Page”.
- Find the “GSP Manage Schedules” component in the Custom section of the left sidebar.
- Drag the component onto the page. We typically recommend positioning it below the Stage Lightning Path, then click Save.
- The same GSP Manage Schedules component supports both Revenue and Quantity scheduling.
- For detailed instructions, refer to the Adjust the Opportunity Lightning Page Layout article.
- Update the Opportunity Product Page Layout.
- Add the following fields to your Opportunity Product page layout:
- # Schedules
- Projection Method
- Schedule Start Date
- Schedule Type
- For detailed instructions, refer to the Adjust the Opportunity Product Page Layout article.
- Add the following fields to your Opportunity Product page layout:
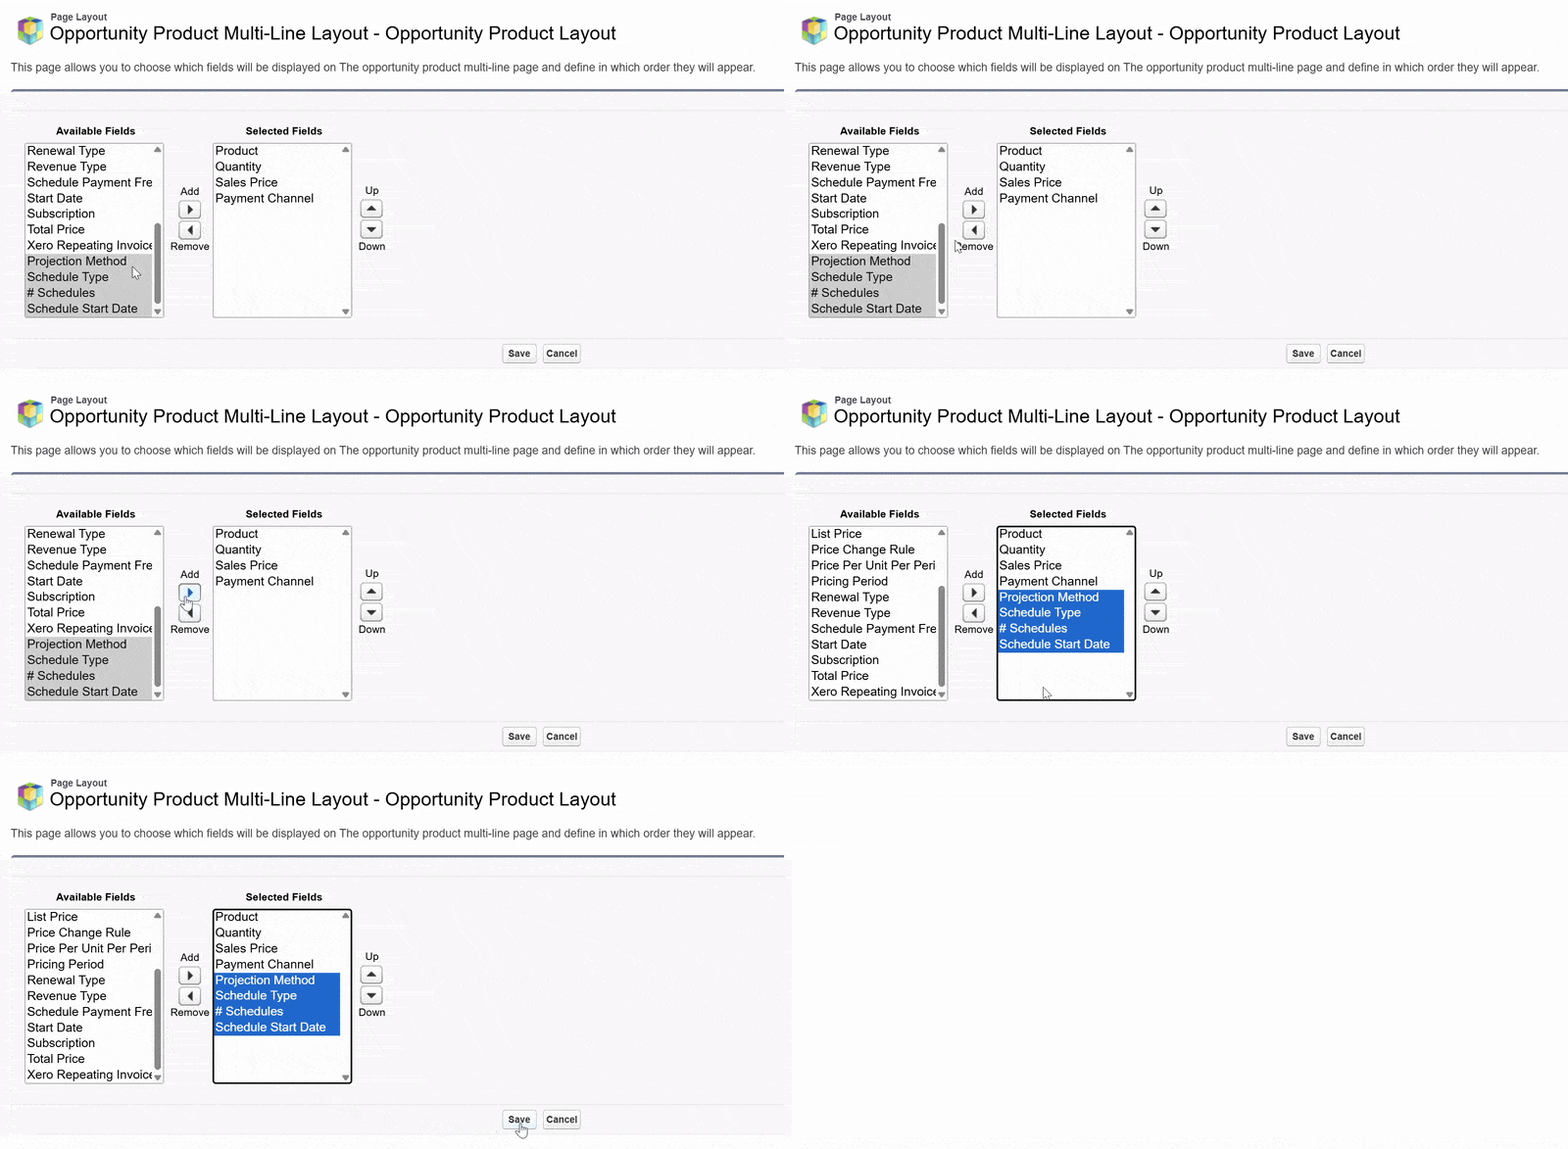
- Update the Opportunity Product Multi-Line Layout.

- You’ll find the link for this at the top of the Opportunity Product page layout.
- Move the following required fields from the left-hand column to the right-hand column, then click Save:
- Schedule Start Date
- # Schedules
- Schedule Type and Projection Method are optional if you’re happy to use the default settings of Revenue and Straight Line. Include these fields if users need to view or change these settings when editing Opportunity Products.
- For detailed instructions, refer to the Adjust the Opportunity Product Multi-Line Layout article.

Outcomes
After completing the installation and configuration steps, the Product Schedules fields and functionality will be available on your Opportunity and Opportunity Product records. You’ll be able to access the GSP Manage Schedules component and start creating schedules for your products.
You can choose to schedule Revenue or Quantity on an individual product basis. This means you can use both scheduling methods within the same Salesforce environment, depending on the type of product you’re working with.
Troubleshooting
Recommendation:
If you’re still having trouble, please get in touch and we’ll be happy to help.
Request Further Support
If you’re still having some trouble, we’re more than happy to help. Let us know what you’re struggling with using the form below, and we’ll be in touch as soon as possible.